Rugby Union Positions Explained: Numbers 1 to 15
Every rugby union position from loosehead prop to full-back: what numbers 1 to 15 do in attack, defence and set pieces, plus the role of the bench.
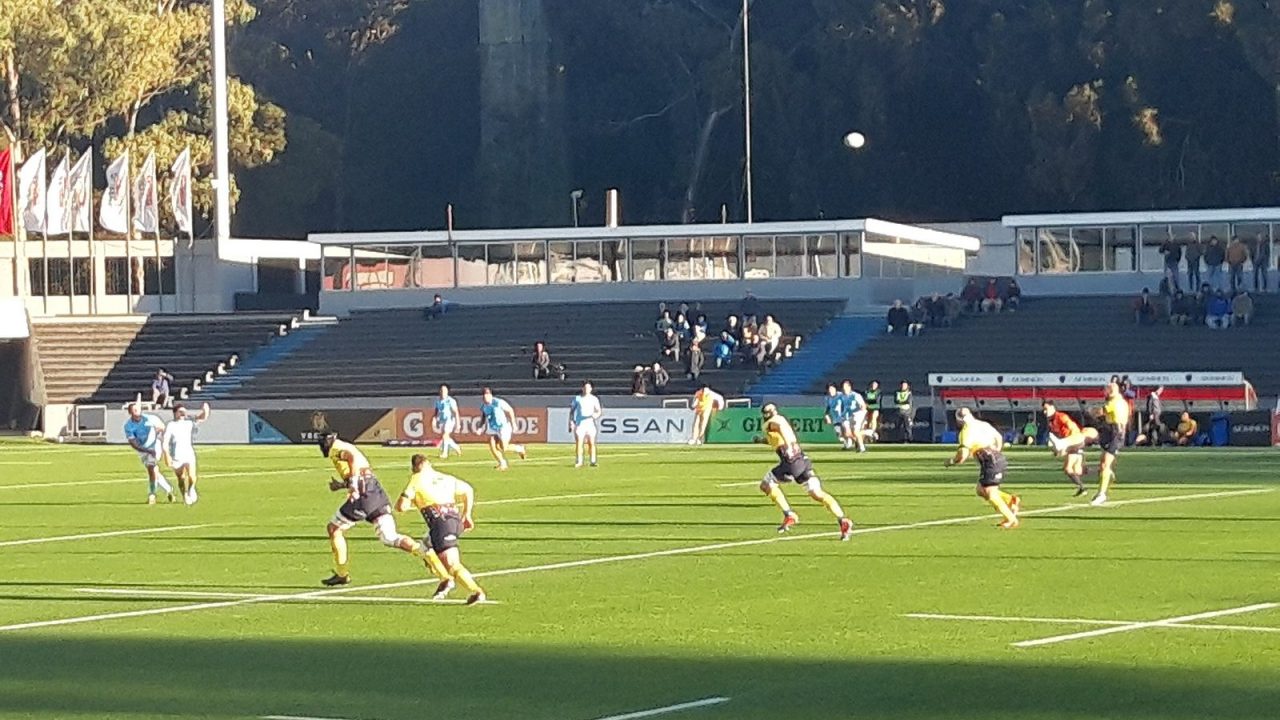
Rugby union is unusual among team sports in how specialised its positions are. A prop and a wing might both be professional rugby players, but they can look like athletes from different sports: one built to absorb the force of a scrum, the other to outrun everyone on the field. Understanding who does what is the fastest way to make sense of a match.
A team has 15 players on the field: eight forwards, wearing numbers 1 to 8, and seven backs, wearing 9 to 15. Up to eight replacements sit on the bench, numbered 16 to 23. If you are still learning the basics of scoring and the breakdown, our beginner’s guide to rugby union rules covers them first.
The Forwards: Why Numbers 1 to 8 Exist
Forwards win and keep possession. They form the scrum, contest the lineout, and do most of the work at rucks and mauls. In general they are bigger and heavier than the backs, and their jobs are more specialised. The pack is usually described in three groups: the front row (1–3), the second row (4–5) and the back row (6–8). The front row and second row together are called the “tight five”.
1 — Loosehead prop
The loosehead packs down on the left of the front row, with their head on the outside of the scrum. Their job is to provide a stable platform and give the hooker a clear view of the ball as it is fed in. In the lineout, props are usually lifters, hoisting jumpers into the air. Around the field they carry the ball into contact and make tackles. Props are typically very strong through the neck, shoulders and back.
2 — Hooker
The hooker sits in the middle of the front row and is bound to both props. In the scrum, the hooker strikes the ball back with their foot once it is fed into the tunnel. Away from the scrum, the hooker’s best-known job is throwing the ball into the lineout, which demands accuracy under pressure. Modern hookers are often mobile and dangerous ball carriers, and many score tries from the back of driving mauls.
3 — Tighthead prop
The tighthead packs on the right, with their head between the opposing hooker and loosehead. That position bears load from both sides, which is why the tighthead is often considered the cornerstone of the scrum. A team with a dominant tighthead tends to win scrum penalties; a team without one can be pushed backwards all afternoon. Because of the specialist nature of the role, quality tightheads are among the most sought-after players in the sport.
4 and 5 — Locks
The locks, also called second-rowers, pack down behind the front row and provide much of the scrum’s power — the “engine room”. They are usually the tallest players on the team and serve as the main jumpers in the lineout. In open play they make short, hard carries, hit rucks, and tackle relentlessly. One lock often takes responsibility for calling the lineout, choosing where the ball will be thrown.
6 — Blindside flanker
The flankers bind on either side of the scrum. The blindside takes the side nearer the touchline, where there is less space. Blindsides are usually the larger of the two flankers: physical tacklers, ball carriers and often a third lineout jumper.
7 — Openside flanker
The openside binds on the side with more space and is often the first player to the breakdown. Their signature skill is the turnover: arriving on their feet over a tackled player and getting hands on the ball before the attacking team can secure it. Opensides need speed, stamina and excellent timing, as they are constantly on the edge of the offside and breakdown laws.
8 — Number eight
The number eight binds at the back of the scrum between the locks. From there they can control the ball at their feet, pick it up and attack, or work set moves with the scrum-half. They are usually powerful ball carriers who can break the first tackle. In South Africa the position is often called the “eighthman”. The three back-rowers together are called the loose forwards.
The Half-Backs: Numbers 9 and 10
The half-backs are the link between forwards and backs, and between them they make most of a team’s decisions.
9 — Scrum-half
The scrum-half (called a half-back in New Zealand) feeds the ball into the scrum and retrieves it from the back of scrums, rucks and mauls. They pass to the fly-half or other runners, kick from the base of the ruck — the box kick is a scrum-half speciality — and direct the forwards around the field. Traditionally the smallest player on the team, the scrum-half needs a fast, accurate pass, sharp vision and the confidence to boss much bigger team-mates.
10 — Fly-half
The fly-half is usually the first receiver from the scrum-half and the main playmaker. They decide whether to pass, run or kick, and they often take the team’s goal kicks. The position has the most alternative names: outside-half or stand-off in Britain, out-half in Ireland, and first five-eighth in New Zealand. A fly-half’s kicking game shapes where the match is played, so the role combines tactical thinking with technical skill.
The Centres: Numbers 12 and 13
The centres operate in midfield, where defences are most crowded.
12 — Inside centre
The inside centre (second five-eighth in New Zealand) stands closest to the fly-half. Many teams use their 12 as a second playmaker who can pass and kick, while others pick a powerful runner to crash over the gain line and draw defenders in. In defence, the inside centre makes many of the tackles in the busiest channel of the field.
13 — Outside centre
The outside centre, usually the quicker of the two, looks to break the defensive line and create space for the wings. Defensively, the 13 has one of the toughest jobs in rugby: they often face attackers arriving at pace and must decide whether to rush up, drift across or hold their ground, frequently against an overlap.
The Back Three: Numbers 11, 14 and 15
The two wings and the full-back are known collectively as the back three. They finish attacking moves and cover the space behind the defensive line.
11 and 14 — Wings
The left wing wears 11 and the right wing wears 14. Wings are usually among the fastest players on the team, and their main job is to score tries when the ball reaches the edge of the field. Modern wings also chase kicks, compete for high balls in the air, and come off their wing to find work in midfield. In defence they must judge when to come up on the outside attacker and when to drop back to cover kicks.
15 — Full-back
The full-back is the last line of defence. They field high kicks under pressure, return them by kicking or counter-attacking, and make try-saving tackles. In attack, a full-back often joins the line as an extra runner to create an overlap. Good full-backs combine safe hands under the high ball, a strong kick and real pace, and many are also capable goal-kickers.
Replacements: Numbers 16 to 23
Under World Rugby’s Law 3, a union may nominate up to eight replacements in international matches. The bench is numbered 16 to 23, and forwards usually take the lower numbers. Front-row cover is mandatory: a squad of 23 must include six players able to play in the front row, covering loosehead, tighthead and hooker. The reason is safety. If a team runs out of trained front-row forwards, scrums become uncontested, which removes a key contest from the match.
The bench is no longer just injury cover. Coaches use replacements tactically, bringing on fresh forwards in the second half when the opposition pack is tiring. The typical split is five forwards and three backs, but some teams load their bench even more heavily with forwards to keep the set piece strong for the full 80 minutes. The trade-off is less cover if a back gets injured.
The laws also allow temporary replacements in certain cases. A player with a bleeding injury can be temporarily replaced for up to 15 minutes of actual time, and a player who needs a Head Injury Assessment (HIA) can be temporarily replaced for up to 12 minutes, even if all replacements have been used. If the player does not return in time, the change becomes permanent.
Positions at a Glance
| No. | Position | Key jobs |
|---|---|---|
| 1 | Loosehead prop | Scrum stability, lifting, carrying |
| 2 | Hooker | Strikes in the scrum, throws in at the lineout |
| 3 | Tighthead prop | Anchors the scrum, lifting, tackling |
| 4–5 | Locks | Scrum power, lineout jumping, breakdown work |
| 6 | Blindside flanker | Tackling, carrying, third lineout jumper |
| 7 | Openside flanker | First to the breakdown, turnovers |
| 8 | Number eight | Controls the base of the scrum, strong carrier |
| 9 | Scrum-half | Passing from the breakdown, box kicks, directing forwards |
| 10 | Fly-half | Playmaking, tactical and goal kicking |
| 11, 14 | Wings | Finishing, chasing kicks, aerial contests |
| 12 | Inside centre | Second playmaker or crash runner, midfield defence |
| 13 | Outside centre | Line breaks, defending the outside channel |
| 15 | Full-back | Fielding kicks, counter-attack, last defender |
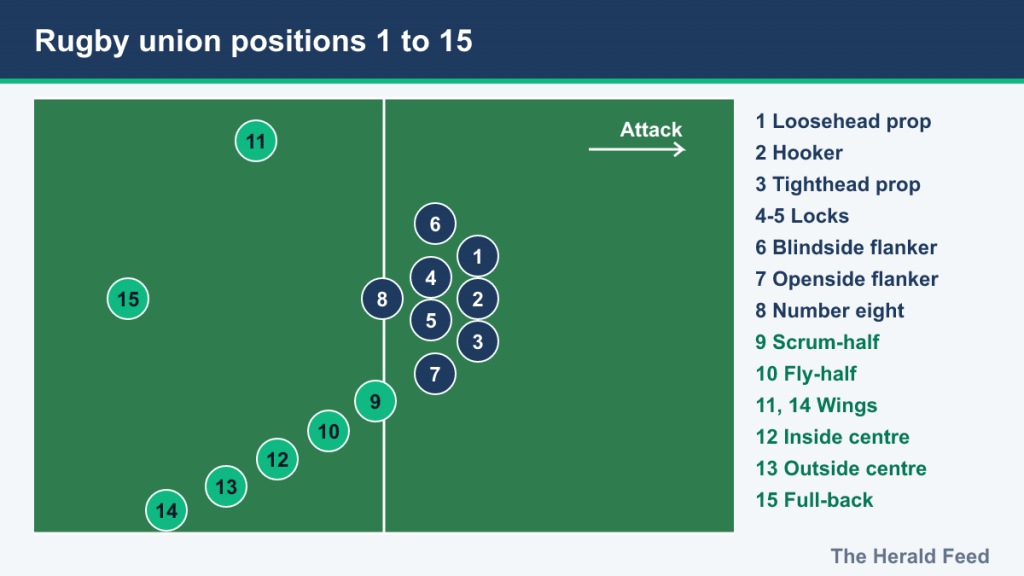
Common Misunderstandings About Positions
“Forwards don’t need skills”
Modern forwards pass, offload and read the game far more than their predecessors. Props are expected to handle in open play, hookers to throw accurately, and back-rowers to play like extra backs at times. The specialisation is in their set-piece duties, not a lack of ball skills.
“Numbers are fixed to players”
In union, the number reflects the position a player starts in for that match, not a permanent squad number. A versatile player might wear 12 one week and 15 the next.
“The biggest players are always forwards”
Usually, but not always. Some modern wings and centres are as heavy as back-rowers, and some opensides are lighter than the centres outside them. Teams pick physical profiles to suit their game plan.
Why do numbers 11 and 14 seem out of order?
Backs are numbered roughly from left to right across the field in a standard attacking line: the left wing is 11, the centres are 12 and 13, and the right wing is 14, with the full-back at 15 behind them. It reads oddly on a team sheet, but it reflects how the line sets up.